7 Smart Ways to Keep Your Camp Coffee Hot All Morning

Use a Double-Walled Vacuum Flask
Pre-Warm Your Mug with Boiling Water
The Cast Iron Skillet Method
Invest in a High-Quality Insulated Tumbler
Keep Your Mug Near the Camp Stove
Use a Thermal Coffee Carafe
The Hot Water Bottle Trick
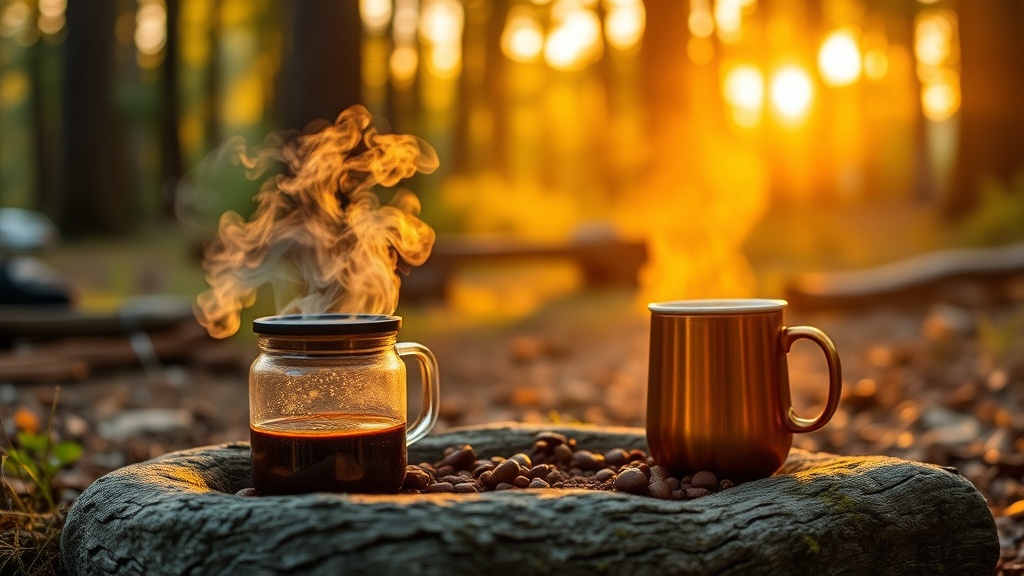
You have just finished setting up your tent, the sun is barely peeking over the treeline in the High Sierras, and you have finally poured that first steaming cup of coffee. Ten minutes later, you realize it has already dropped to an unappealing lukewarm temperature. This is a common frustration for campers, especially during early spring or late autumn trips where the ambient temperature can drop significantly. Keeping your coffee hot isn't just about comfort; it is about maximizing your morning ritual so you can actually enjoy the stillness of the campsite before the day's activities begin. This guide covers seven practical, gear-based and technique-driven methods to ensure your coffee stays at a drinkable temperature from the first sip to the last.
1. Pre-heat Your Vessel with Boiling Water
The most common reason coffee loses heat rapidly is "thermal shock." When you pour 200-degree water into a cold ceramic mug or a stainless steel camping cup, the vessel immediately absorbs a significant portion of that thermal energy to raise its own temperature. This can drop your coffee temperature by 10 to 15 degrees instantly. To prevent this, always perform a pre-heat cycle.
Before you even start your coffee brewing process, boil a small amount of water on your camp stove. Pour this water into your mug or French press and let it sit for at least sixty seconds. While the water is warming the vessel, you can finish prepping your grounds or packing your gear. Once the vessel feels hot to the touch, pour out the warming water and immediately begin your actual brew. This small step ensures the energy stays in the liquid rather than being lost to the walls of your cup.
2. Use Double-Walled Vacuum Insulated Tumblers
If you are using standard enamelware or single-walled stainless steel mugs, you are fighting a losing battle against physics. Single-walled metal conducts heat away from the liquid very quickly. For serious coffee drinkers, investing in a double-walled, vacuum-insulated tumbler is the single best upgrade you can make. Brands like YETI and Stanley have set the standard here, but many high-quality options exist at various price points.
The vacuum seal between the two walls of the tumbler creates a literal void that prevents heat transfer via conduction and convection. This is particularly important if you are camping in windy environments, such as an open ridge in the Cascades, where wind chill can strip heat from a surface almost instantly. A high-quality insulated tumbler can keep coffee at a near-optimal temperature for several hours, making it ideal if you are busy with morning chores like breaking down camp or organizing your vehicle.
3. Utilize a Thermal Carafe Instead of a Mug
Many campers make the mistake of brewing a full pot of coffee directly into a single mug or a small pot. This leads to a high surface-area-to-volume ratio, meaning more heat escapes through the top. Instead, brew your coffee in a dedicated thermal carafe. A 1-liter thermal carafe is a staple for many road trippers and long-term campers.
The strategy here is to keep the bulk of your coffee contained in a highly insulated environment and only pour small amounts into your drinking vessel as needed. This prevents the "lukewarm leftovers" problem where the last half of a pot becomes undrinkable. If you are traveling in a vehicle, a carafe is also much more stable and less prone to spilling than an open mug during transit. For those who find their gear management is often a struggle during transitions, using a structured bin system can help keep your coffee carafes and brewing kits organized and protected from breakage in your vehicle.
3. Control the Temperature of Your Water
The temperature of the water you use to brew is just as important as the vessel you drink from. If you are using a standard percolator or a pour-over method, you need to ensure your water is at the correct temperature to begin with. For most coffee, you want water between 195°F and 205°F. If your water is only 180°F, your coffee starts its life "cold" by professional standards, making it much harder to maintain heat later.
When camping, especially in high altitudes or cold weather, your stove might struggle to reach these temperatures. If you are using a liquid fuel stove or a butane burner, be aware that cold wind can sap the heat from the flame. If you notice your stove performance is lagging, you might want to check out guides on why your camp stove is failing in cold weather to ensure you are getting the most out of your fuel. Consistent, high-heat brewing is the foundation of a hot cup of coffee.
5. Create a Heat Shield or Windbreak
Wind is the enemy of heat. Even if you have a great insulated mug, a gust of wind hitting the surface of your coffee will accelerate evaporative cooling. When you are setting up your morning coffee station, do not just place it on a flat rock or a folding table in the middle of an open clearing.
Position your coffee station near your tent, your vehicle, or a large cooler to act as a natural windbreak. If you are in a particularly exposed area, such as a coastal campsite or a high-altitude plateau, you may need to use your camp chair or a piece of gear to create a temporary barrier. By reducing the airflow over the top of your mug, you significantly slow down the rate at which heat escapes the liquid. This is especially vital if you are using a lid, as the lid prevents convection, but the wind can still strip heat from the edges of the lid itself.
6. Add a Lid to Every Vessel
It is a simple rule of thermodynamics: an open container loses heat much faster than a closed one. If you are using a mug without a lid, you are losing a massive amount of energy through evaporation. Even a simple silicone lid or a specialized coffee lid can make a measurable difference in how long your beverage stays hot.
If you don't have a dedicated coffee lid, even using a small piece of aluminum foil or a small camping plate to cover the top of your mug while you are not actively drinking will help. This creates a micro-environment of warm, moist air above the liquid, which acts as an additional layer of insulation. This is a critical habit to develop, especially if you are multitasking—such as checking your map or adjusting your sleeping bag—and might not take a sip for several minutes.
7. Use the "Double Cup" Method for Minimalist Gear
If you are a minimalist camper and don't want to carry a heavy, bulky thermal carafe or a high-end vacuum tumbler, you can use the "double cup" method. This involves nesting a smaller cup inside a larger one. The air gap between the two vessels acts as a layer of insulation, similar to how a double-paned window works in a home.
You can do this with two different sized stainless steel camping mugs. Place your coffee in the smaller inner mug, and then place that mug inside the larger one. You can even add a little bit of hot water or a small piece of a heat pad into the gap between the two to further enhance the thermal retention. While this is less efficient than a professional vacuum-insulated product, it is a highly effective "hack" for those who want to keep their pack weight low while still enjoying a hot beverage during a long morning hike or a stationary camp session.
Maintaining a hot cup of coffee is a matter of managing heat transfer through conduction, convection, and evaporation. By implementing these seven strategies—from pre-heating your gear to utilizing windbreaks—you can ensure that your morning coffee remains a highlight of your camping trip rather than a lukewarm disappointment. Whether you are a seasoned van-lifer or a weekend car camper, these small adjustments to your routine will significantly improve your outdoor experience.